Thanks for the flowers, Arthur. There are some who might think I'm paranoid because I keep multiple clones of my Macs at all times. But is it really paranoid if something bad has happened before, like losing a drive suddenly and catastrophically?
I'm blessed (or cursed, depending on one's perspective) with a whole box of 3.5" and 2.5" HDDs, some of which are in their own enclosures, but most I just plug into a dock I keep on my desk and can hot-swap to my heart's desire. I keep "partial clones" of my system as well, and they're not bootable for security reasons and I keep offsite since I'm not going to ever discount the possibility of a fire wrecking everything.
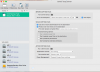
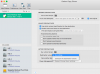
With CCC, I noticed Reesche had his "Safety Net" on. This is the best choice, especially if one is backing up to a drive which is much larger than the one being cloned. The "Safety Net" is a dedicated folder at the primary level of the clone which contains files which have been changed or even deleted since the previous cloning session. And they're in dated folders, so if one deletes a file (accidentally or otherwise) and then wants it back, all one need do is simply mount that volume (booting from it is unnecessary for this purpose) and then locating the file and dragging it back to your "home" drive or wherever you want.
I heartily recommend that the clone drive have at least twice the storage capacity of the drive being cloned. This affords the user with ample space for storing a lot of "Safety Net" folders and need only be "pruned" when the clone begins getting crowded. And I further recommend that no one ever let a drive have less than fifteen percent of free space. This is for both performance purposes as well as extending the useful life of any drive.
If one is using a 1TB internal drive (HDD or SSD) and are approaching 850GB of used space, it's probably time to consider either getting a bigger drive or "offloading" a bunch of stuff to free up space. I'm kind of a weirdo about that. I get nervous when I have anything less than 25% of free space available. Believe me, it makes a difference in not only performance speed, but also lets macOS do its own thing in defragmenting the drive without resorting to a defragmenting program, which I discourage with extreme prejudice. Third-party defragmenting apps are NOT beneficial, regardless of what the guys at TechTool or elsewhere may tell you. Purposely defragmenting a drive, most especially a SSD, will drastically shorten its life.
And, yes, macOS does defragment drives in the background without any assistance.